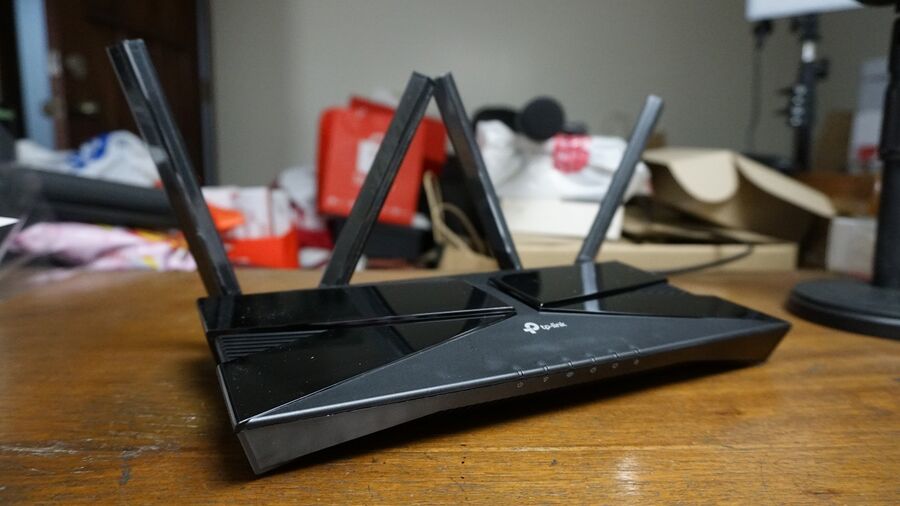
My home is connected to PLDT Home Fibr for the past five years. It changed not only the way I use the internet, it also affected my whole family too. My mom, for instance, noticed that our connection is faster than our previous DSL subscription. She loves to watch K–Dramas on her phone, and thanks to PLDT Home Fibr, she upgraded to a HUAWEI tablet. However, the fast internet connectivity is only limited to our ground floor. It can reach my room on the second floor, but the connection is not stable enough. It’s about time I should really get a new wifi router. Talk about good timing, ‘coz our new friends from TP-Link Philippines contacted us and offered us to review their new Archer AX23 WiFi 6 Router.
Table of Contents
Why do I need a TP-Link Archer AX23 WiFi 6 Router?
The TP-Link Archer AX23 is using the latest WiFi technology, the WiFi 6. It offers better network efficiency, capacity, and faster speed compared to WiFi 5. But even though it is the latest technology, it is still compatible with WiFi 5 and older WiFi devices.
With that upgrade in its WiFi capability, you can now fully utilize the speeds that ISP providers are giving out as ISP providers here in the Philippines are boosting insane internet speed nowadays.
The Unboxing
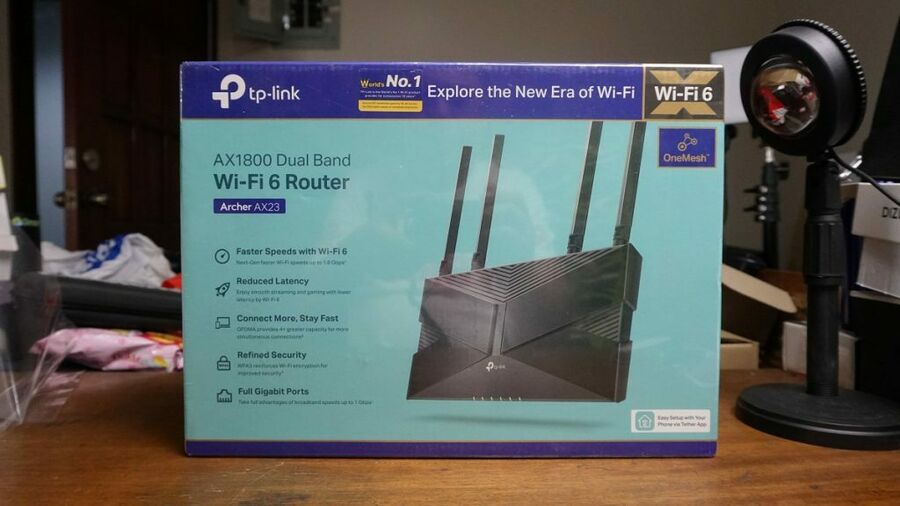
The box of the TP-Link Archer AX23 greets us with some of its features. It is a Wi-fi 6 router with faster wi-fi speed up to 1.8Gbps, and with reduced latency. It also has OFDMA which means it provides greater capacity for more simultaneous connections. It has also refined security as it uses WPA3 and full gigabit ports. To make it much simpler, all 4 ports that we have with the router are gigabit ports.
At the back of the box, we can see more information about what we saw in front. We can also notice the wi-fi mesh capability of the router, its Smart Connect where it has only one single SSID for 2.4Ghz, and its 5Ghz where the router automatically assigns your devices to the best available band for optimum connections. There is also Gigabit internet access, and has its management system for parent control and guest network. On the sides of the box, we can see the router parts, features and specs. Though It is not stated on the box, this router can be set up as a mesh with another compatible router and an access point besides its default wireless router setting.
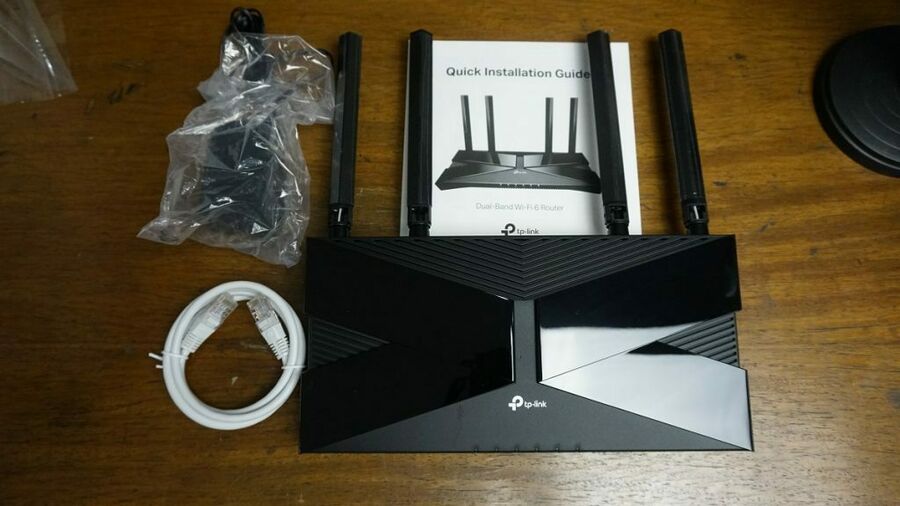
As we open the box, we get the Archer AX 23 router, power adapter, RJ45 Ethernet Cable, and quick installation guide.
The Design
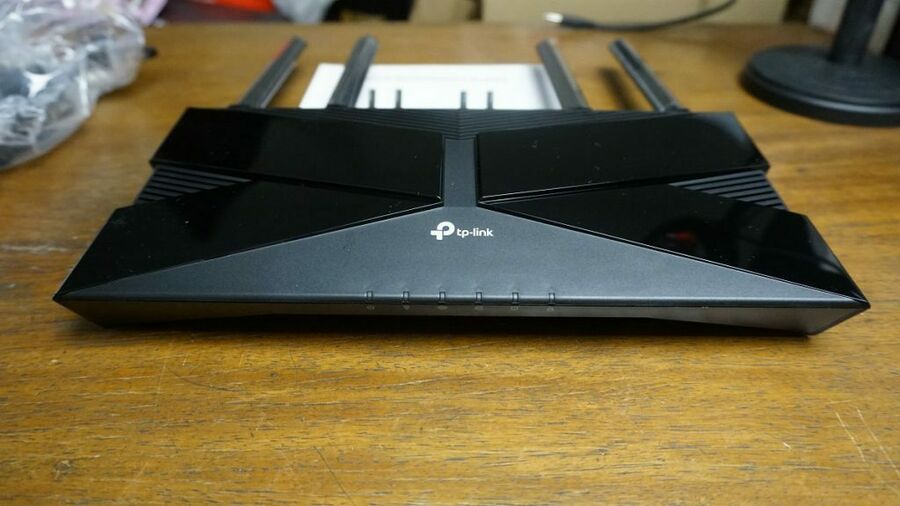
The Archer AX23 Router comes in a mixed black glossy and matte finish on it. The glossy parts are fingerprint magnets, so be careful when touching it. But don’t worry, the fingerprints that you made can be easily wiped. There are also air holes at the top and some on the sides.
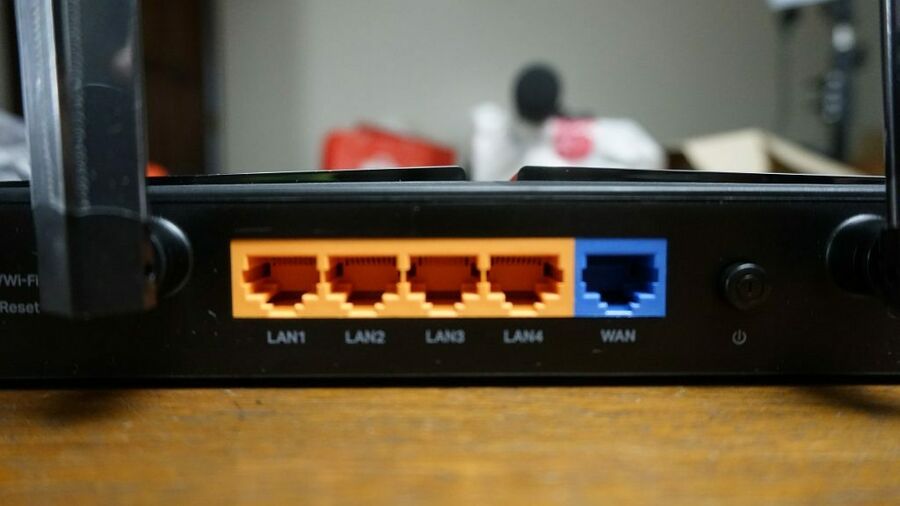
At the front, we have the LED indicator while at the back, we have the power port, power button, WAN port, 4 Gigabit ports, and buttons for WPS/WIFI and reset. We also have 4 antennas here. Underneath are tons of holes again for ventilation and the information about the router system.
Setting It Up
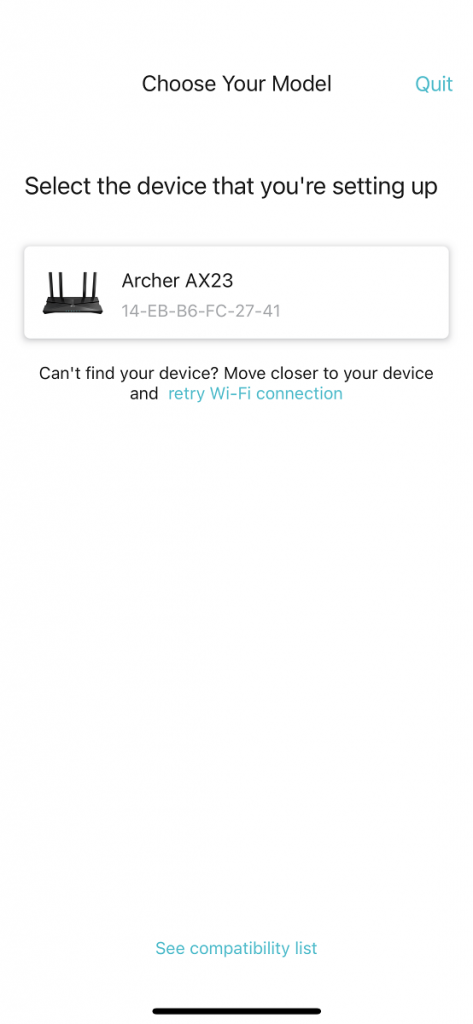
The Archer AX23 is easy to set up. You can set it up by downloading the TP-Link Tether app on your smartphone or your pc browser. This article will run down how to set it up on your smartphone, so let’s download the Tether app.
Upon opening the TP-Link Tether app, we will be asked to log in. So simply just create an account if you don’t have one. Once you are on the homepage, we will press the add button in the upper right part of the screen and we will choose: wireless router > select standard routers > then it will run us down the things we need to do, and just press next. Now, it will be asking us to connect to our router, and the next thing that you will do is to check on the wifi setting and connect with the router the password which is underneath the router. Once connected, let’s go back to the app and press connect. Now we will see our archer ax23 router.
Proceeding to the next step, here, we just have to create a password for our admin access for the router. Next is the connection type > Then we will be selecting the dynamic IP > And we can change its Mac address but we will choose the recommended option > In this part, we will now set up the Wifi name and password.
And that’s it, we are already done setting up our archer ax23 router. We just need to reconnect on our wifi because we set up its new wifi password. We can also bind the router to our TP-LINK ID so that we can still access it even if we are not connected to our router.
Router App Interface
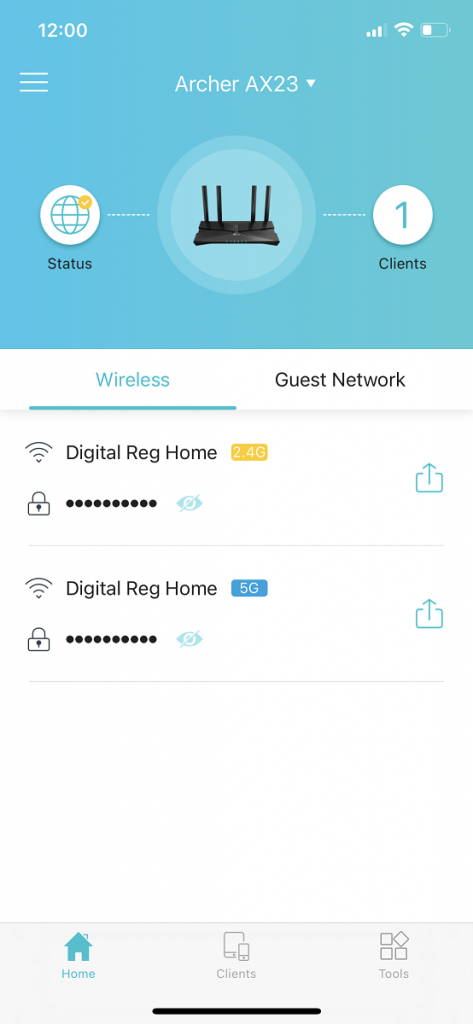
Upon checking the app interface for the router, we can see here how many devices are connected to this router. This is very helpful if you want to know what devices are connected to it.
In the Tools tab, we can also see all the things we can do with the archer ax23 router.
We also have the OneMesh which will be set up with another OneMesh compatible router or extender for it to make a one big network. Thanks to this, you don’t need to worry about transferring to another wifi when you are in another part of your house.
QoS or Quality of Service allows you to set priorities for your devices. For example, you are playing online games and you want your ping/latency to be low and stable, you can simply configure it here. Parental control is where we can select the devices we want to allow this feature. This can be done by blocking or allowing only the sites that the device can access. Besides that, you can also set allowed time to have internet connectivity for the set of devices or even set its internet time limits.
It also has network diagnostics which is a simple way to test your network if you have internet. Guest Network is where there will be separate WiFi that you can configure whether to have access to your local network or not.
Also, it has Share Wifi feature where you can see all the WiFi SSID and password. This is where you can find its QR code where people can scan it to connect to the WiFi.
The TP-Link ID option is where you can give other people access or manage your router settings. LED Control is where you can enable or disable its LED status. You can also enable its night mode which will turn off the LED lights for a specific time.
Its Operation Mode is where you can change its router setting if you want it to be a wireless router or access point. And lastly, you can also schedule a reboot for the router.
Our Experience
We conducted some speed tests and compared the TP-Link Archer AX23 with our ISP-provided router. Our PLDT Home Fibr subscription is at 50 Mbps with speed boost provided once in a while.
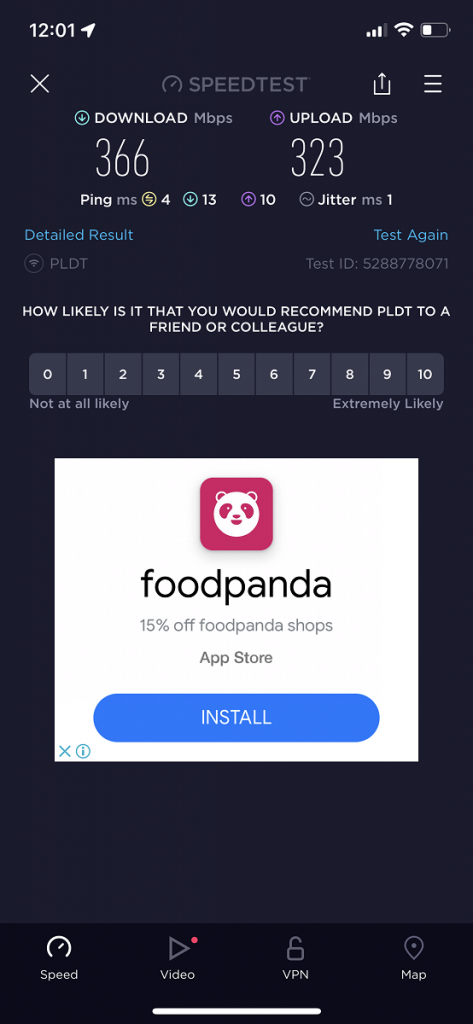
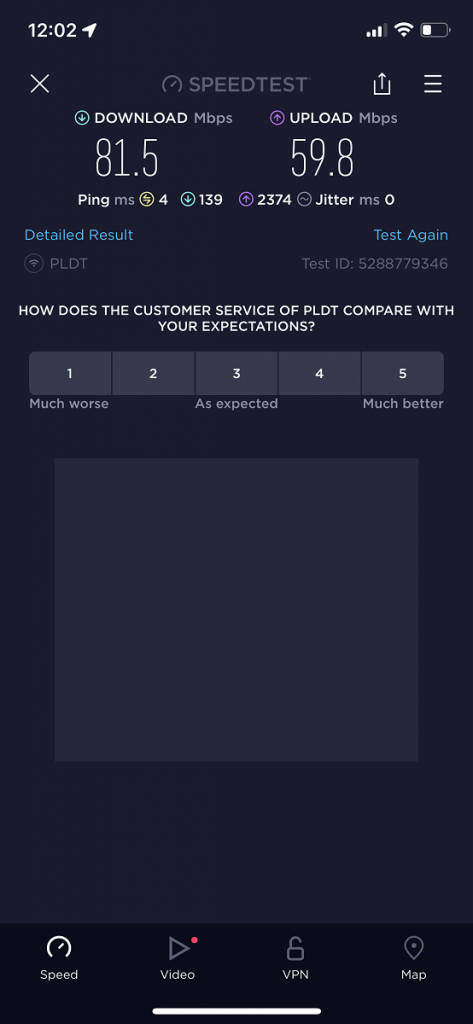
We did our first test on the ground floor where the ISP router is located. The TP-Link Archer AX23 WiFi 6 router produced 366 Mbps download and 323 Mbps upload speeds! That is 7x than the monthly plan I’m paying for! Meanwhile, the ISP-provided router only reached 81.5 Mbps download and 59.8 Mbps upload speeds. The difference between the two routers is staggering!
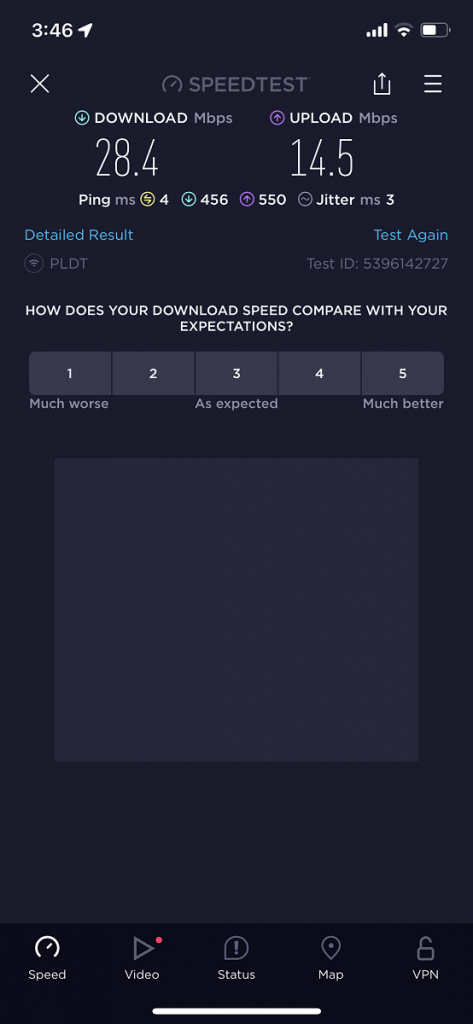
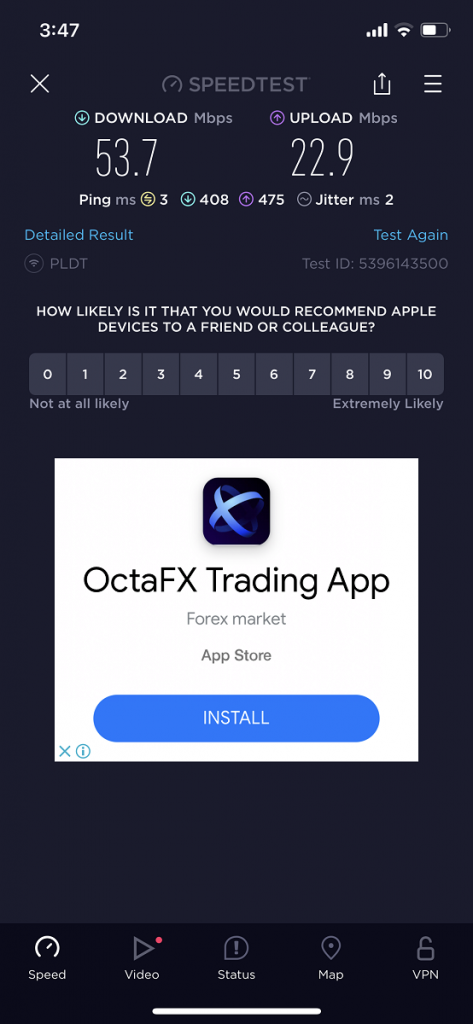
Changed the location of our tests to my room in the second floor where I needed to be online most of the time. On our 2nd test on our ISP-provided router, we were able to get 28.4 Mbps download and 14.5 Mbps upload. On the other hand, we were able to get 53.7 Mbps download and 22.9 Mbps upload with the Archer AX23 router.
What we noticed the TP-Link Archer AX23 was more stable especially when I’m in the second floor. Usually, my connection drops once in a while whenever I am connected to the ISP router especially when I am in the middle of my room.
TP-Link Archer AX23 Verdict

Honestly, I wished I could’ve gotten the TP-Link Archer AX23 WiFi6 router sooner. The extra boost in speeds was a big factor especially now my devices are already on WiFi6. The additional features seen in the TP-Link Tether app are very useful and I could easily tweak it for added security.
You can get the TP-Link Archer AX23 for Php 2,990 but you can spot it under Php 2,700 on Lazada and Shopee.


